Quantcast
Channel: QVC : Community : Mom to Mom Blogs Blog
Viewing all 335 articles
Browse latest View live

How-to Make an Over-the-Door School Supply Organizer

$
0
0

Hi, everyone!

How is school going for your kids? Are they still having fun? My kids have another few months before the days seem to start earlier, the homework gets tougher, and the “love” really starts to fade. But the chaos has officially hit the Bauer house and their school stuff is EVERYWHERE. Luckily, I anticipated this.  And, before school began, I created a school supply organizer for the pencils, crayons, markers, and supplies.

School Supply Organizer

Okay, I may or may not have also wanted to feature this project on You’re Home with Jill so I had to make it before school began. But, it's it awesome! That’s an over-the-door shoe organizer. I use these everywhere in my home…in my closet for shoes and accessories, in the kids’ rooms for their toys, and I’ve even seen them used in the pantry to hold spices, kitchen utensils, and foods. So, I thought, why couldn’t I make a school supply organizer?

Here’s what you’ll need:

  • Shoe organizer with clear plastic pockets
  • Scrapbook paper or card-stock
  • Label maker
  • Double-sided tape
  • School supplies

And to assemble, measure the inside of clear pockets and cut your scrapbook paper or card-stock to size. Insert the paper and adhere each piece with a piece of double-sided tape. Decide how you would like supplies to be organized, make the labels for each pocket, and adhere them to the front of each pocket. 

School Supply Organizer

That’s our DIY project this Wednesday on You’re Home with Jill. Stay tuned for my blog on Tuesday…I’ll share my recipe for Apple Brownies! See you Wednesday at 7pm ET!

From my home to yours,
—Jill


The Most Wonderful Time of the Year!

$
0
0

Ever since I can remember, Sundays were a BIG day in our household.  Each week, my dad and I would sit down in front of the television, with slices of ring bologna and a bowl of chips in hand - and watch football!!! Then, we would do it again on Monday nights. Even as I write this I can hear the classic Monday Night Football theme music...(Dada, Dada, Dada)... and the familiar voices of Howard Cosell and Al Michaels.  Those two were like family.  I love football! 

My dad played in college and he and I would toss a ball around in the backyard.  Growing up, I watched a lot of Steelers games in awe of the precision of Terry Bradshaw and agility of Lynn Swan.  But I grew up around Philadelphia, so I started as an Eagles fan.  Then, while attending college in Pittsburgh, I was quickly won over by the city's love of the game, its humble roots and the amazing Steelers fans.  I have never looked back and bleed black and gold on game day. I've taken a lot of heat for it, especially from my husband who is a die-hard Eagles Fan.  But it's all good!  The rivalry is fun and makes for a loud Stauffer household. 

  My best friend, Liz, and my Steelers rally partner in crime!


My oldest son Ben now plays flag football and I'm sure his little brother will be right behind. It’s a whole different experience cheering for a team for which your children play.  I am little more nervous, but it definitely makes the game I so dearly love - that much sweeter!  

My dad and Ben #7

Little Larry in his Eagles jersey and Mickey.

Ok - pass the chips....

-Stacey


Happy Fall! Who Wants Apple Brownies!

$
0
0

Hi, everyone!

I always like to share new recipes with you, but tomorrow on You’re Home with Jill we’re continuing our celebration of fall and there’s no recipe that says fall quite like my Apple Brownies. So I thought I would share this yummy dessert, which is already on my recipe page on QVC.com. What you haven't seen yet is this step-by-step video on making them. Enjoy.

I’m so grateful to have this recipe…I may not have gotten to own my own bakery—yet, at least. But I can bake at home and with you on You’re Home with Jill. How lucky am I?

Apple Brownies

Apple Brownies

Ingredients:

  • 2/3 cup butter or margarine
  • 2 cups brown sugar
  • 2 eggs
  • 2 tsp vanilla
  • 2 cups flour
  • 2 tsp baking powder
  • 1/4 tsp salt
  • 1-1/2 cups apples, chopped
  • 1/2 cup nuts, chopped (optional garnish)
  • Powdered sugar (optional garnish)

Preparation:

  1. Preheat the oven to 350°F. Grease a 9'' x 13'' pan.
  2. Cream the butter or margarine and brown sugar together. Add the eggs and vanilla and mix until combined. Reduce the mixer speed to low and add the flour, baking powder, and salt. Mix until the batter is smooth. Stir in the apples and nuts with a spatula.
  3. Bake for 30 minutes, or until the brownies are light brown in color. Allow the brownies to cool and then dust with powdered sugar before serving.

Don't forget...YHJis on tomorrow at 7pm ET!

From my home to yours,
—Jill

Make a Rustic Centerpiece from Your Yard Waste!

$
0
0

Hi, everyone!

That antiqued, rustic look in home décor is everywhere right now. Mason jars are the flower-vases of choice. Burlap is the new must-have fabric. It really makes entertaining seem easier and welcoming…far less intimidating than it once was. You don’t have to buy fancy silks and china to impress guests. Being together is really what’s important.

I’ve embraced this trend wholeheartedly and we’ve made lots of DIY projects on You’re Home with Jill that speak to it…everything from my Fall Wreath to my Antique Metallic Vase.

This Wednesday we’re adding to the collection with a great Rustic Centerpiece.

 Rustic Centerpiece

Here’s how you make this:

You will need:

  • 6" straight-sided, glass vase
  • 13" piece of burlap
  • Sticks/branches gathered from outdoors
  • Jute or twine
  • Craft glue

To assemble:

  1. Wrap the vase with burlap and tuck 1-2" inside of the vase. Glue in place. 
  2. Wrap 1" of burlap under bottom edge and glue in place.
  3. Cut sticks to approximately 7" and 8" in length. 
  4. Lay the sticks down in a straight line, altering lengths until you have enough to surround the entire vase.
  5. Using the jute, weave the branches together near the bottom and top keeping the bottom edge in a straight line. 
  6. Tie off when the string of sticks is long enough to wrap around and cover the entire vase. 
  7. Wrap around the vase and tie together at the top and bottom.

I was lucky enough to find some sticks in our yard-waste bags that got me started with this project. But, I needed a few more. And, I didn’t want to ask my husband Doug to help me.

Girls, how do you feel about using a chainsaw? If you’re like me, I was pretty nervous until QVC let me try out a chainsaw Today's Special Value® we have coming up this Wednesday. I know what you’re thinking—me with a Paul Bunyan-sized chainsaw, plaid lumberjack shirt, the whole nine yards. But that’s not really me. Instead, think tiny chainsaw on a pole. This chainsaw won't take down trees…it just cuts those hard-to-reach branches and limbs. It’s pretty cool. And, if you’re in need of a few sticks to tackle this DIY project, you can’t find an easier-to-use tool.

More on that this Wednesday…now enjoy your weekend! See you later today for Dooney & Bourke and then on Wednesday at 7pm ET for You’re Home with Jill.

From my home to yours,
—Jill

Kindergarten, Preschool, and Life Lessons for Mom

$
0
0

I’m living in this moment...or so I keep reminding myself. It’s taken me 36 years of constant worrying about tomorrow to get to a point where I’m not even thinking about tomorrow. Well actually, it took my baby going to kindergarten to get me to stop focusing on the next sunrise and just bask in this one.

You all told me when we adopted Grace and when I got pregnant with Georgia that we needed to cherish every moment because they grow so fast.

I did, and they did. 

But as a mom of practically twin babies, at the time, there is a lot of worrying about them. Wondering how to pay for them and focusing on the next time they (and I) sleep. Not so much living in the moment. But, I did savor every second of their babiness, maybe even more than most because it took me more than three years to get them. I honestly thought I might never be a mother and they are both truly miracles. There were none that survived before them, and though we've tried for years, no babies since. So yes, they are miracles… and yes, I am a very present mom. 

But in the days leading up to kindergarten something changed for me. I was taken by a physical overwhelming panic that I need to stop time.  

On back to school night I curled up in my five year olds chair at her cute little classroom table and looked up at her shiny new teacher. I felt nothing but faith in this adorable young woman. I believed she would love and care for my child for the seven hours each day that I would not. But, when one of the dads asked about first day drop off and this sweet little brunette teacher said in a loving way that we kind of "just push them out the door" the tears started to fall.  

And well, they kept falling for a couple days.

I wasn't the only one. Georgia and Grace were both weepy little mush puddles the days leading up to the first day of school. After a hard couple hours with fighting and pouting I finally asked what was going on and Grace burst into tears and said, "I'm just going to miss my sister."  Georgia cried her eyes out two years ago when Grace left our home headed to preschool (for all of two hours,) so I knew Kindergarten was going to be a huge adjustment for the little sister.

But On her first day, Grace was all smiles.  

She was adorable in her little blue dress and perfect pink backpack that dwarfed her little girl body. She was ready. I was not.

At drop off we all kept it together and cheered as we watched our first-born pulled into the arms of a caring counselor. My husband left for work and Georgia and I started out on our first day alone without Grace since the girls were born. I was okay for about an hour but then I got a text from hubby…

"I can't believe she is in Kindergarten, Now I’m crying."

…and just like that so was I. I tried to keep it from Georgia so she wouldn't be upset. But I couldn't stop crying. We went to Calista Grande to get my haircut and Maria was so kind and tried to keep my mind off missing my baby.

We then went to get Georgia’s toes painted for the first time. She loved it and we got to have a first together, something that is rare for the second born.

And slowly between haircuts & hugs there was a shift. I watched my second born relax into our new one-on-one role and I remembered that this moment was a gift. Instead of wishing that the clock would hurry up and get to three so I could pick up Grace, I started to savor every sweet slow second without her. I still missed her, but I didn't wish any time away.  

I have always thought, I can't wait until... winter is over... or this or that vacation...or the girls can tie their own shoes...or we can finally afford....?? But not anymore. I don't want to get to another moment but this one. Each second is a blessing. 

At the end of that first day of kindergarten, when I held my sweet girl in my arms after seven long hours apart, I felt so thankful that I had made it to that point. I savored that little girl’s body snuggling up against me. I knew in the back of my mind there would be a day that she wouldn’t jump into my arms after school but I wasn’t thinking about that. I was living in the moment. The lightly lingering baby smell, the sweet sound of her high voice, the feel of her smooth skin next to mine.

We celebrated with frozen yogurt …

…and a much needed nap.

…All that living in the moment is tiring.

The next week Georgia started preschool.  

There were a few tears and my usually brave and independent child was clingy and shy. But, I didn't wish her insecurity away. I sat with her in her class on that first day and held her and allowed her to stay my toddler a little longer. No need to push her to grow up. But she did. She eventually peeled herself out of my arms and sat with her schoolmates and stood to say the pledge, and I savored that moment as well.

It’s not easy yet. I still miss Grace every day, and I value our weekends even more.  Grace and Georgia are getting more used to school but there are still some tears and an odd dynamic when they are back together at the end of the day. However, I’m not wishing away even this rough transition period. I’m living in it and learning from it. Who would have thought that back to school for the kiddos would mean mom learns a lesson of a lifetime.

"Why, you do not even know what will happen tomorrow. What is your life? You are a mist that appears for a little while and then vanishes. Instead, you ought to say, “If it is the Lord’s will, we will live and do this or that.”

James 4:14-15

Xoxo

Kerstin

www.facebook.com/kerstinlindquistqvc

www.twitter.com/kerstinlindqvc

Smores Delight - No Campfire Required!

$
0
0

Hi, everyone!

Summertime and campfires go hand-in-hand. And even into the fall, it’s so nice to cozy up to a campfire with friends and family and roast marshmallows…or, if you’re lucky, make smores! But what do you do in the winter and spring when you’re craving a warm campfire and those toasty treats? Use your oven.

Smores Delight

Ingredients:

  • 1 box chocolate cake mix
  • 1 cup milk
  • 1 (5-oz) cook & serve chocolate pudding (not instant!)
  • 1/2 cup cold butter, cut into tablespoon sized pats
  • 6 whole graham crackers, broken in half
  • 1/2 cup mini chocolate chips
  • 40 large marshmallows

Preparation:

  1. Preheat the oven to 350°F. Grease a 13" x 9" baking dish.
  2. Combine the milk and pudding mix in a large bowl and then pour it into the baking dish. Place the graham crackers on top of the pudding mixture with space in-between each one and then add the mini chocolate chips. Dump the cake mix into a separate bowl to break up any clumps. Then, spread it over the chocolate chips. Drop the pats of butter on top.
  3. Bake for 25 minutes. Mix slightly so there aren't large areas of dry ingredients. Then, add marshmallows and bake for another 8–10 minutes. If you want to "toast" the marshmallows a bit more, place the dish under the broiler for about a minute. Keep your eye on it, though, because it can burn quickly!

This recipe is prepared with the Temp-tations® Vintage Grace 9" x 13" Baker with Wire Rack (K37922).

Smores Delight

That’s tomorrow’s recipe on You’re Home with Jill everyone…I’ll see you at 7pm ET.

From my home to yours,
—Jill

Wedding Advice for the Beautiful Bride!

$
0
0

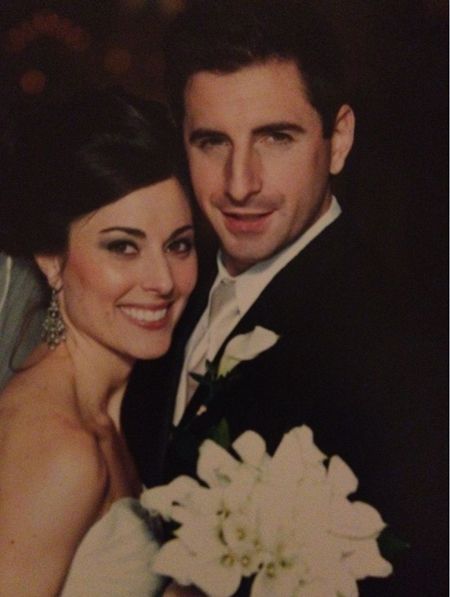
Sandra


Amy


Antonella

Don't expect perfect..things will happen the right way, things will happen the wrong way.... At the end of the day, you will be married to the one you love, and that's ALL the really matters!!!

Good Luck & Good Love

Xo

A


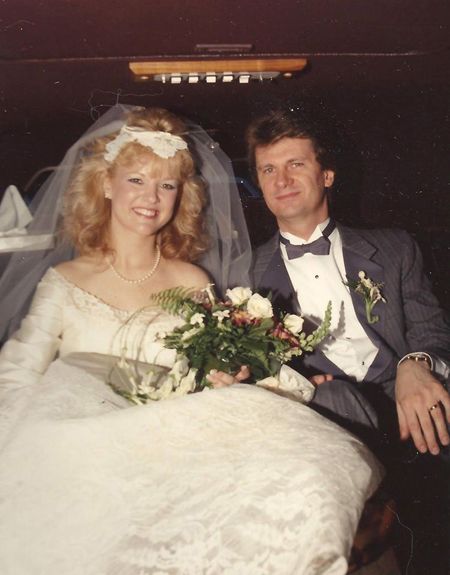
Stacey

Eat a good breakfast, Put away the cell phone and Don't sweat the small stuff! 


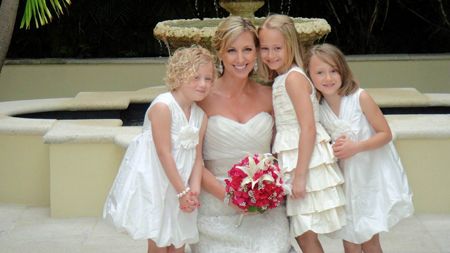
Jill

Dear Courtney and Aaron,

Take time to step away from the wedding events and festivities to really SEE what is happening around you.  As the bride and groom, it's so easy to get caught up in all the fun and before you know it, the evening will be over, you won't have really seen everyone and everything, and you can't go back!  It's YOUR first celebration as husband and wife....make sure you're really able to have a birds eye view to enjoy the day and each other!


Jane

Jacque

Carolyn

Kerstin

Wedding Day Advice for Courtney Cason!

$
0
0

Some of our hosts want to offer their wedding day (& life beyond!) advice to the beautiful bride-to-be. Peek at their wedding day pictures and read their messages to Courtney!

Jane Treacy:

"Remember to breathe and enjoy your day! Nothing goes exactly as planned, and those are usually the moments you will treasure forever!"

Amy Stran:

"Try your very best at some point during the ceremony to look out at all of your friends and family that are there to celebrate this special moment with you and Aaron!"

Carolyn Gracie:

"Congratulations Courtney and Aaron!!  After 26 years together, my husband Mike, and I agree that three things are keys to a happy marriage (along with L-O-V-E of course!!) Compromise.....Teamwork....and Humor!!! Bend a little at times, help each other out without having to be asked, and make each other laugh!! The next 50 years will fly by!! Wishing you all the happiness in the world!!"

Jill Bauer:

"Take time to step away from the wedding events and festivities to really SEE what is happening around you.  As the bride and groom, it's so easy to get caught up in all the fun and before you know it, the evening will be over, you won't have really seen everyone and everything, and you can't go back!  It's YOUR first celebration as husband and wife....make sure you're really able to have a birds eye view to enjoy the day and each other!"

Stacey Stauffer:

"Eat a good breakfast, Put away the cell phone and Don't sweat the small stuff!"

Antonella Nester:

"Don't expect perfect..things will happen the right way, things will happen the wrong way.... At the end of the day, you will be married to the one you love, and that's ALL the really matters!!! Good Luck & Good Love."

Albany Irvin:

"Learn to listen intently, be willing to compromise, say “I’m sorry” when you’re wrong."

Jacque Gonzales:

"Enjoy the day and all of the love that will surround you!  I'm sending you and Aaron blessings for the happiest and closest of marriages!  (Make sure Lisa catches the bouquet like we made happen in my wedding!) Also, stop and eat at your reception - most couples get too busy to stop, eat and enjoy the moment TOGETHER! :)  I can't wait to see pictures!  Love you!!!"

Sharon Faetsch:

"Don’t expect it to be too perfect. It just doesn’t exist, but remember it’s the little idiosyncrasies and the tiny imperfect moments that will make it your special day."

Gabrielle Kerr:

"Relax! Enjoy the party and appreciate everything! This is one of those rare happy occasions where you get to be with all of your friends and family in one place."

Sandra Bennett:

"After being with my husband for about a decade, I try to remember to treat him the way I treated him when we were first dating. It was so easy to be extra loving, kind, and a good listener. All relationships have their "ups" and "downs." The "up" times are easy. However, during the "down" periods, I make a conscious effort to turn on a little more "sparkle" by smiling at him more, giving more hugs, and making sure we are talking. It's that classic rule: Treat others like you want to be treated. I find it works wonders in a marriage."

Kerstin Lindquist:

"Never live parallel lives.  Despite having different careers and friends make sure you include your spouse in those at work events, happenings & relationships.  He should always be the one you want to tell everything first, no matter what the subject is."


Leave your wedding day advice for Courtney Cason in the comments below!


Layers by Lizden Marvelush Shrug TSV Preview: Fall is in the Air

$
0
0

Summer is a wonderful season….warmth, sun, colorful clothing, beaches + BBQ’s, yet, I have to admit that I LOVE transitioning into Fall…warm days with a chill in the air, and cool, crisp evenings.  Plus it’s the perfect season for Marvelush!

Marvelush is a 12 season fiber.  Our lives are so hectic; we’re always looking for double duty wardrobe enhancers.  As a Mom, wife and business woman, I’m always on the go, and never without Marvelush. 

I keep wraps on chairs and beds in our home, in the car for long rides when the AC is too high, or it’s too cold out, and in my tote bag, even in the summer.  Office buildings + theaters are always freezing, and supermarkets can be giant refrigerators. Its cloud like loft insures warmth without the weight.  And with predictions of another bitter cold winter, who wouldn’t want to be cozy in front of the fire or snuggled in a comfy spot reading or relaxing?  It’s my personal adult blankie.

That’s why I’m so excited about my new fall Marvelush collection…from the hottest fashion trend, the Eternity scarf to my new TSV Shrug.  This Shrug will quickly become your favorite new fall accessory!  It’s perfect no matter what climate you live in.  In cool climates it will be your new fashion layering piece. In the south, it will be your go to chill out of the air throw on.   And it’s ageless…my son’s friend Marianna is in love with it too!

The wonderful color selection lets you expand your fashion wardrobe wherever you live.  With 7 choices, from Radiant Orchid to Ink Navy, there’s a right color choice for you!  Plus, it’s easy wear, + easy care.

I’ve been living in this shrug for a few weeks now. This is the time of year I want to spend as much time as I can outside. I wear this Shrug for morning coffee on the deck; as soon as the sun starts setting, I pop one to extend my time outside and at the end of the day.

It’s also the perfect choice for dinner on the patio. 

I’m enjoying the versatility of the Shrug.  At 5’2 “, I can wear it belted with flats or sandals, or loose + flowing over a skirt or leggings with boots, wedges or heels. I know this will become a wardrobe staple for you! You can see it here http://qvc.co/LayersByLizdenTSV first.  Please join me at midnight + all day on September 22, and let me how your incorporating this in your fall wardrobe.


Handmade Holiday Cards - Have the Kids Help!

$
0
0

Hi, everyone!

When You’re Home with Jillis on this Wednesday night, we’ll be exactly three months away from Christmas. I've always been the kind of person who likes--and tries--to plan ahead and shop early. So, if you're like me, be sure to join me at 7pm ET.

In today’s technology-driven world, it’s so nice to receive a hand-written letter, isn’t it? You can almost feel the time that the person spent writing it just by holding that note in your hand. For lots of us, the only time of year when we sit down to write friends and loved ones a hand-written note is in our holiday cards. I cherish the cards I receive every year and I really make an effort to take time to send hand-written cards to as many people as I can.

At the end of last year I saw some of the cutest holiday cards ever. Imagine how special your recipients will feel if you send them these handmade cards and include a handwritten note! The kids will LOVE helping with this!

Handmade Christmas Cards

Handmade Christmas Cards

It couldn’t be easier to make these...here’s what you need:

  • Box of craft cards, mixed colors
  • Multicolor stamp pads
  • White craft paint
  • Tiny googly eyes
  • Colored markers
  • Wipes

Feel free to make any of the designs we featured here. Or, if you have another clever design idea, go for it! I highly recommend doing a few test runs on regular paper so you’ll feel confident when making your first card…I did!

  1. Have your child press his or her thumb/finger onto stamp pads according to the colors you have chosen. (I found the white stamp pad did not show up well at all and decided to use white craft paint for all the white finger print cards.)
  2. Help your child place his or her finger on the cards. (Before changing to a new color, it’s really important to wipe fingers clean so you can get a true color.)
  3. When you’re done stamping, let cards rest so the ink can completely dry.
  4. Add the googly eyes, as needed, then use markers to add details, borders, names, and holiday messages.

Oh, and #5…make sure you have Christmas music playing, hot chocolate simmering on the stove, and your favorite holiday snack at the ready for your little worker elves.

I’ll see you Wednesday at 7pm ET for You’re Home with Jill.

From my home to yours,
—Jill

The Comforts of Home

$
0
0

We live in a tiny farm house built in 1800. It's like a 1500 sq ft dollhouse; low ceilings and small rooms spread out on three floors. But it is cozy and has charm. The kitchen leads to the dining room leads to the living room. All in a horse shoe around my favorite space: the big outdoor patio and yard. We've never had land or property, and it is quite peaceful and freeing. Since the home is small my girls share a room, and we are all in close quarters. But it's a cheery, beachy home on the inside that really reflects what's most important to me... Family. I will always consider myself a California beach bum, so I try to incorporate that feeling into every inch of my home (see where I get my inspiration!). Hope you enjoy the tour :)

Welcome! (Okay, it's more like a farm house than a beach shack, but we are beach people at heart!)

The front porch is a historic looking covered area with the original stone well still in place.

Our two girls spending time in the dining room

Our kitchen. A chalkboard in this area of the home is so helpful.

Our shabby chic-inspired living room

Our outdoor oasis :)

My favorite reading spot!

We may not be living on the ocean, but our surfboards remind us we need to go to the beach as often as possible!

Family :)

Love creating gallery walls with family photos.

Can you tell two little girls live in here?

Our bedroom...my hubby made the bed frame!

When we moved in we immediately had to gut and redo the small mud room bathroom and downstairs to make it livable for my cousin. We made it super beachy and I'm so proud of that pretty blue bathroom.

Since my cousin moved out we've turned the space into a playroom/spare bedroom.

Thanks for taking a look into my cozy home!

Easy Skillet Pasta Bake - Warm, Hearty...SO Good!

$
0
0

Hi, everyone!

Happy FALL! I shared a quintessential fall recipe with my Facebook friends this morning…my Pumpkin Apple Bisque. We served this soup in hollowed-out pumpkins when Doug and I were married.

Pumpkin Apple Bisque

I know I’ve shared that recipe with you before, but people still talk about it. Now for a recipe you haven’t seen before. Tomorrow night on You’re Home with Jill we’re helping you get ready for the now-closer-than-ever holiday season. Here’s my Easy Skillet Pasta Bake recipe…something you can throw together when unexpected guests arrive. Or, whip this up after a long day of decorating outside.

Easy Skillet Pasta Bake

Easy Skillet Pasta Bake

Ingredients:

  • 1 Tbsp olive oil
  • 1 small onion, chopped
  • 1 tsp minced Garlic
  • 1 (26-oz) jar of pasta sauce (I like tomato-basil)
  • 1/2 package extra wide egg noodles
  • 1 cup water
  • 1/4 tsp salt
  • 1/4 tsp crushed red pepper
  • 1/2 cup low-fat Ricotta cheese
  • 1 cup shredded Italian six cheese blend
  • 2 Tbsp chopped fresh basil (optional garnish)

Preparation:

  1. Sauté the onion in olive oil in large skillet over medium heat until tender.
  2. Add the garlic and sauté for just a minute or so before adding the pasta sauce, egg noodles, and water.
  3. Bring the mixture to a boil. Reduce the heat to medium-low and simmer, stirring occasionally, 8–10 minutes, or until the pasta is just tender and the liquid is almost absorbed.
  4. Stir in the salt and crushed red pepper.
  5. Stir together the ricotta and 1/2 cup of shredded cheese in a small bowl.
  6. Drop tablespoonfuls of cheese blend over the pasta. Sprinkle with the remaining shredded cheese.
  7. Cook, covered, over low heat for 5 minutes, or until thoroughly heated and the cheese is melted. (If you want brown, bubbly cheese, stick the skillet in a 400°F oven, uncovered, for a few minutes.)
  8. Remove the skillet from the heat and let the dish stand for about 5 minutes. Garnish with basil, if desired.

This recipe is prepared with the Cook's Essentials® 18-Piece Porcelain Enamel Cookware Set with Dupont Nonstick (K41304).

So what can you do this fall that will save you time later? Since we’re talking about food, let’s start in the kitchen. I’ve got a whole holiday section in my recipe box and while I have some “extra” time, I like to look at my recipes and stock up on the ingredients. Fill your freezer with the meats and veggies. Fill your cabinet with canned goods and other non-perishables. Then, get extra flour, sugar, chocolate chips—and all those cookie ingredients you’ll need.

I know your holiday decorations are all packed away, but if you take a half hour and peek in the boxes, you’ll be ready to decorate—exactly how you want to—when the time arrives. Maybe you finally threw away that hand-me-down wreath last year. Maybe you donated some items to charity…it’s been a year since you’ve been in those boxes. Reminders are helpful.

You can also get a head-start on your Christmas cards! We’re making handmade holiday cards tomorrow night and I previewed that DIY project in my blog on Friday. See you tomorrow night on You’re Home with Jillat 7pm ET!

From my home to yours,
—Jill

Mason Jar Lid Pumpkins! Make Your Own Fall Decorations

$
0
0

Hi, everyone!

Most of you know how much I love mason jars and how many DIY projects we’ve used them for on You’re Home with Jill. But what I haven’t told you is every time we make one of those crafts, I’ve kept the tops. It just feels wrong to throw those rings away in case I ever use the jars for their intended purpose!

So as I was recharging my creativity on Pinterest, I saw a terrific idea of how to use those mason jar rings…no jar required. Check this out.

Mason Jar Lid Pumpkin

Isn’t that a great pumpkin (Charlie Brown)? It’s so easy to make…here’s what you do:

Find:

  • 14 small or 20 regular mouth canning lids
  • 20-24” jute/twine
  • Orange spray paint
  • 3-4 cinnamon sticks

Then:

  1. Spray paint the lids on each side until you reach the coverage you want.
  2. When dry, string the lids onto the jute, making sure they all face the same direction.
  3. Tie the two ends of jute together in a double knot and cut the excess. 
  4. Place the cinnamon sticks in the middle and adjust the spacing of the rings.

Some stores sell mason jars in all different sizes and you could create your own little pumpkin patch! Or, you could use different spray paint to make multicolor pumpkins…some orange, yellow, or white. The more you make, the more cinnamon you'll need and what a terrific smell they'll give off!

Now that's my kind of weekend project--why not give this a try and send me your pumpkin pics. I’ll see you for You’re Home with Jill this Wednesday at 7pm ET.

From my home to yours,
—Jill

Every Moment Matters

$
0
0

Fall is in the air, and here on the East Coast we can feel that slight chill in the air that tells us it's time to bring out the sweaters, boots, and scarves. The last two weeks have been particularly bittersweet for me as I watched my youngest son start kindergarten—bravely climbing those tall stairs to the unfamiliar classroom with new teachers and new friends-to-be. Is it too cliché to say it seems like just yesterday he was napping on my shoulder, burp cloth under his chin, sighing contentedly in his sleep? But life moves on for him and for me, and the kids being in school full time does has its advantages. There's more time to devote to all the other balls in the air: career, marriage, and personal well-being. Speaking of the latter, I encourage all of you to use this time of the year to take stock of what you're doing to take care of yourselves—mind, body, and spirit—and set some realistic goals that you can accomplish by New Year's.

And, of course, remember to enjoy the small joys that pop up in your daily lives along the way!

Best,

—Dr.Raj

Gourd-geous Lights!

$
0
0

Hi, everyone!


I know we just had our You’re Home with Jill fix last night, but I’ve been wanting to share this DIY project with you since last month…I just had too many other things to tell you about! Anyway, now that it’s October, I couldn’t wait another minute.


Do you use battery-powered lights for your decorations at home? I LOVE them…you can bring light and life to all of those special pieces and you don’t have to worry about cords. When my husband Doug and I decorate for Halloween, we put them everywhere—inside and out—and this year, I’m putting them everywhere…and then some. See?


Pumpkin Lights


Isn’t that cool? Here’s how you make this:


Find:

  • String of lights  (around 30-100, depending on size of pumpkin)
  • Medium to large pumpkin (I used a medium-size pumpkin with a string of 40 lights)
  • Serrated knife
  • Scooper
  • Drill


Then:

  1. Cut a circular hole in the top (or bottom) of the pumpkin.
  2. Scoop out the flesh, pulp, and seeds with a scooper or scraper.
  3. Use a drill equipped with a ½” or ¾” spade bit to drill the holes. (If your strand has 30 lights; drill 30 holes.)
  4. Push each light through a hole until it feels firmly in place.
  5. Turn on your lights, return the pumpkin top, and enjoy!


I used a medium-size pumpkin and a strand of about 40 lights. And if you can’t find battery-powered lights, you can also use electric lights. You’ll just need to make a hole in the bottom of your pumpkin for the cord to escape. And, when you drill the holes, keep the pattern random.


Happy fall, everyone! I’ll blog with you again tomorrow.


From my home to yours,

—Jill


P.S. Remember when I asked you to help me transform our living room from drab to fab? We did it! You hearted your favorite items on QVC’s toGather® and we created the room. Check it out on toGather!


DIY Wine Glass Charms – Put That Old Board Game to Good Use!

$
0
0

Hi, everyone!


Consider this Wednesday’s You’re Home with Jillyour holiday entertaining guide. It’ll be everything you might expect…I’ve got home essentials to help you be the perfect hostess, I’ve got a delicious recipe your guests will go crazy for, and I’ve got the greatest trick to keeping your guests wine glasses straight!

Homemade Wine Charms


I know you have a game with letters that you and your family just doesn’t play anymore. When you find that game, here’s what you need to do:


Gather:

  • Letters
  • Dremel tool or drill
  • Silver floral wire
  • Super glue
  • Ball chain


Then:


  1. Drill a very small hole in the top of your letter with a small drill bit or Dremel.
  2. Take the wire, form a tiny loop, twist, and cut the ends short.
  3. Carefully add a drop of glue and insert the ends of wire into the drilled hole.
  4. Thread the ball chain through the loop and cut it to fit loosely around the wine glass stem.


Now, obviously you’ll want to make a wine glass with your initial first. Then, you’ll need to test it out on your favorite glass. If that glass happens to become full of wine, sangria, or your favorite beverage, that’s all part of the testing process. You’re welcome!


XOXO,

--Jill

Live Shoe Shopping Show - Halloween Fun - Who's Shoes? - Where's Kiki?

$
0
0

My human family is at it again. They love Halloween and these pictures were shown at the live show (that I was NOT invited to). Just sayin’.

So – here they are in their costumes and having fun at the show. It was the very first live audience for Shoe Shopping so there was a lot going on.

Where am I you ask? You’ll see.  

Cute Deirdre.

Sweet Cara.

The whole gang dressed as Hocus Pocus characters.

Say cheeeeeese Alberti.

Who wore the witch hat better?

Hmmm..what's on Amy's head??? 

Selfie time.

Angel brought gifts. So nice.

Angel doing a pretty scary witches scream.

Who is that masked man?

Thanks to Angel for the witches boot gift and for being the first "whose shoes" secret guest. If you're not sure what that is, you have to tune in next time to find out.

And my human mom wanted me to thank everyone for coming to the live show. She loved it and had a blast and hopes you did too!

As for me - here I am - in another hat.

I think I need an agent.

-Kiki


TSV Preview! Carole Hochman Pajama Set w/Fleece Jacket, Knit Top & Leggings

$
0
0

Tune in tomorrow for an exciting day to be shopping for sleepwear and loungewear on QVC. We are premiering some fabulous key items that are destined to become your new favorites, as well as bringing back the top rated sellers you already know and love!  So we’re showing everything you need to get through this holiday in style and comfort — from everyday lounge sets for you to gifts for special friends.

My inspiration? Keeping you cozy, calm, and collected. Feel-good fabrics are a must and provide the foundation of all my designs! I wanted every piece and set I designed to be a favorite you could easily spend a whole day comfortably wearing, without ever looking or feeling like an afterthought. That’s why,for colors, I went with rich jewel tones and sophisticated neutrals, and for silhouettes I kept it classic and modern at the same time by playing with longer proportions in flattering, traditional shapes that support your active and varying lifestyles. But like always, I didn’t skimp on the details. Patch pockets, pin-tucking, lace, and shirring, aren’t just design details to me, they are the finishing touches that have made Carole Hochman Heavenly Soft Sleepwear a fan favorite over the years.

So as you start to put together your wish list and to-do list for the holiday, don’t forget to shop for those stolen moments that make all the difference in your days: large family breakfasts, mornings spent reading in bed, late night TV marathons, mad online shopping dashes, round-the-clock baking, and more. Because you can be sure those are the moments that motivated and influenced me as I designed these sets and pieces for QVC and for you.

Here’s to a comfortable and healthy holiday season! Here’s a sneak peak at what’s coming below:

Carole

TSV:  Lounge in style in this Fleece Jacket, Knit Top and first ever Legging PJ TSV in Petite and Average lengths

Flannel and Micro Fleece PJ:  Feel the difference! This must-have Micro fleece and Yarn Dyed Flannel PJ in 6 colors- bet you can’t chose just one! In petite and average Lengths

Winter Paisley 3pc PJ: Tried and true, comfy and feminine, our top rated Winter Paisley 3pc PJ – check out the new color!

Poly Rayon Jersey Leopard Print 3pc PJ: The perfect combination of comfort and style!

She said, "YES"!!

FFANY Shoes On Sale - Thank YOU for the support!!

$
0
0

It’s been a whirlwind couple of weeks devoted to FFANY Shoes On Sale. But it really did start months and months ago. From our hard working shoe planners and buyers working with our generous donors, to planning a fun night of shoe shopping! Here are a few, well more than a few, photos from the past couple of weeks. There are so many people to thank, but mostly YOU for supporting this important cause along with us! 

Off to the gala! And, yes, I chose the Ann Marino Kingdom Dress shoe.

Excited!

Lauri - makeup artist extraordinaire

Beautiful clock in the Waldorf Astoria.

Erin - One of our Marketing Specialists who did a fantastic job!

How do I look in pink lighting?

Recognize that lady twirling down the pink carpet?

Sure - we are always happy to have our picture taken with shoes!

Paparazzi - the Q crew hard at work!

Sally Combs - always fun!

Amy Oselken - loved having my shoe family there!

Leilani Learn looking lovely!

Touch up time.

Like mother - like daughter.

Proud Mom moment.

Lovely gals from our shoe team.

Pretty pink chandelier.

Two of my favorite gals.

Part of our broadcast crew all dressed in pink! 

Nancy and I want to send a big THANK YOU to everyone involved for making this year's event so so special! We absolutely couldn't do it without each and every one of you!

-Jane


Viewing all 335 articles
Browse latest View live


<script src="https://jsc.adskeeper.com/r/s/rssing.com.1596347.js" async> </script>