Here is where this sweeps will live

Here is where this sweeps will live
Fozzie first became a part of our lives a little over 10 years ago. I was a new show host, and my husband had just relocated here from Las Vegas. We had always talked about getting a dog, and this seemed like the time to do it.
There was no debate about the breed. We had both grown up with poodles, and loved the fact that there was no shedding. So, we checked the paper and found a breeder of red poodles about a half hour away. I grew up with an apricot poodle, and had never heard of the red color before, so I was curious. We drove there expecting to see the last two of the litter, but there was only one left when we got there.

Fozzie was the cutest, sweetest little ball of fluff I had ever seen! He looked like a tiny bear cub! We decided pretty quickly that we wanted him, and on the drive home, we talked about names. Because of his unusual coloring, we tried going for names that had to do with food, or being a natural redhead. First, we tried Fritter (as in Apple Fritter), and it didn't feel right. So, we talked about Ginger, Brandy, Nutmeg, and other spices, but they all sounded girlish.

Since he was a boy, it was making it a lot more challenging. Finally, we thought about our love for movies, cartoons, and comic books. I thought about Sesame Street, and that brought me immediately to the Muppets.

Scooter came out first, but then, like magic, Fozzie Bear popped into my brain. I knew it was perfect before I even said it. Between the tawny, fluffy fur, and the fact that Fozzie seemed like a little huggie-bear, it was perfect. When I said it, my husband's face lit up, and he said, "Yes! That is totally perfect!" My husband has also worked as a stand-up comedian, which is another tie-in to our beloved Fozzie.

Even now, his name tag is in the shape of a little black bow tie! If only Fozzie could really tell jokes, I'm sure he would finish every one with a hearty, Wokka Wokka Wokka!
Spring is prom season and yet another senior year memory for Nicole...Prom has changed over the years from gown shopping in January to prom-posals..

The prom-posal happened on a fund raiser night in front of an auditorium of peers and families.. Nicole’s friend Adam cleverly proclaimed his love of math and spelled PROM on his calculator. Nicole accepted as the auditorium roared!
Well the day finally arrived with torrential rain threatening to dampen the moment...instead it added to the best night of my life for Nicole..


If you look closely you will see me running in the rain too...

The night continued with lots of pics of family and friends. Our entire town came to cheer on the kids on the Red Carpet..


Her prom theme was "Making Sweet Memories" with a fun and safe after prom in the school...this happy picture was on the way home at 5 am after the prom...

This gave me a chance to remember my junior prom.. my date Mike took me to dinner and bowling with our friends... my prom theme was “Color My World” in the school cafeteria complete with a paper rainbow..

So now I want you to share your prom memories too...complete with pictures too..another memory as a keepsake of Nicole's senior year... It was the night of her life!
You can find me on Facebook at: www.facebook.com/PatJamesDeMentriQVC
Twitter: www.twitter.com/pdementri
Instagram: www.instagram.com/patjamesdementriqvc
Hi, everyone!
We’re bringing the outdoors in on Wednesday’s You’re Home with Jill…a concept that’s EVERYWHERE right now in the design world. Garden elements bring a sense of serenity to your indoor spaces, as well as life and vibrant color. I'm sure you've seen terrariums in design magazines and all over the web. But have you ever wondered how to make one?

Essentially, a terrarium is like its own eco system. To build a one successfully, you have to imitate nature and not only provide soil in which plants grow, but rocks, pebbles, and moss to help with drainage and holding everything in place. You also want to make sure the plants you’re using all require similar light and water requirements and be sure they’re slow-growers, otherwise they’ll be out of your terrarium before you know it.
Here are the plants I decided to use…I’ll be honest, I’m not sure of their names. I went to my local nursery and asked for several plants to put inside a terrarium and a kind (and patient!) garden center employee helped me. She even explained that many nurseries are starting to sell terrarium kits, so everything you need to build yours could be in one central location. Look for these areas inside the garden center—where indoor plants can be found.

This almost looks pretty enough to keep as is! And, you can, if you like—as long as the pot-sides are low, as pictured here. Don’t use a high-sided opaque clay pot or glass dish, otherwise light can’t reach your plants.

When you’re ready to build your terrarium, stones go on the bottom. Again, these help with drainage, since glass vessels don’t have drainage holes. Adding rocks helps protect the plant roots.

Next, add some sheet moss which helps keep the soil in place. I’ve read that you can also soak the moss in water for a few minutes, which helps keep in moisture. You just want to be careful that the moss isn't too wet when it goes inside your terrarium.

The dirt goes on top of the moss, and be sure you have plenty of it. You’ll want to dig holes to plant your vegetation, just like in nature. The roots of your plants must be completely covered. And, start with the largest plants.

When all the plants are in, consider adding some decoration to the top of the soil. I loved how a layer of pebbles—and a few larger river stones—looked on top. I’m sure you’ve also seen some terrariums with little gnomes or figurines—add as many as you like.

Talk about a visual piece from top to bottom. And notice how the soil isn’t completely level? Nothing is really level in nature, so don’t spend time leveling out each layer.

I put mine right on the coffee table so it can be enjoyed...and admired! Keep an eye on your terrarium over time—make sure it’s getting enough light and water. And, it might be a good idea to use a mild pesticide now and then to prevent bugs from living and thriving in your indoor garden. If your plants should be pruned occasionally, take time to do it and your garden will look this good for many months to come.
So how else can you bring a taste of the outdoors inside? Why not take a few pictures of your garden and hang them on a wall? Here’s how you make a great photo grouping like this:

Get a large roll of paper and lay out the photos—it’s easiest if you can visualize things on paper before making marks on your wall. Use a measuring tape to make sure the pictures are equally spaced…it doesn’t matter how much space you have as long as the space is even.

Tape the paper on the wall where the mural will be. Grab a frame, pull the hanging wire taught, and measure the distance from the frame-top to the wire. Then, mark the measurement on the page and gently nail a hole through the paper into the wall, so you’ve made a mark.

Almost there…

There! Who needs an interior designer (or hubby!) to help you hang photos…not you!
I’ll see you Wednesday. If you're tuning in on QVC Plus, the show's on at 7pm ET. If you're watching on QVC.com, you can play the episode anytime.
From my home to yours,
—Jill
I have been looking for the time to sit down and post some Bree photos into a blog for you, and I’m finally getting to it now. We are loving every second with our little girl and apparently she is loving every second of sleep, lol! Here are some of my favorite pics…
Here is a picture of Bree after a bath, because someone has around here has to get washed, lol!

We drove up to Maryland so that Bree could meet her cousins Drew, Reese, and Abby for the first time. Although she screamed throughout the photo shoot, I still love this picture!

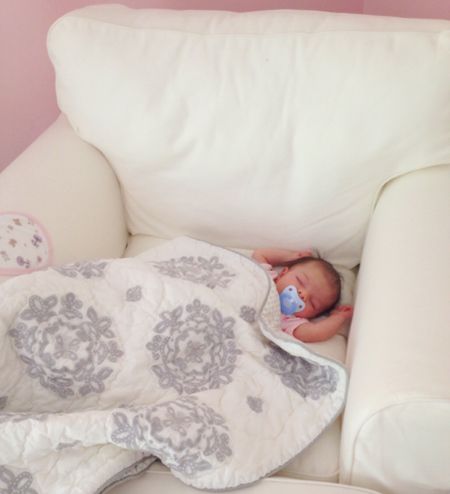
Okay so here is where our Sleeping Beauty photos begin. Out of all the places Bree seems to catch some shut eye, I think this one is her favorite. 

The prettiest sleeper in the world!!
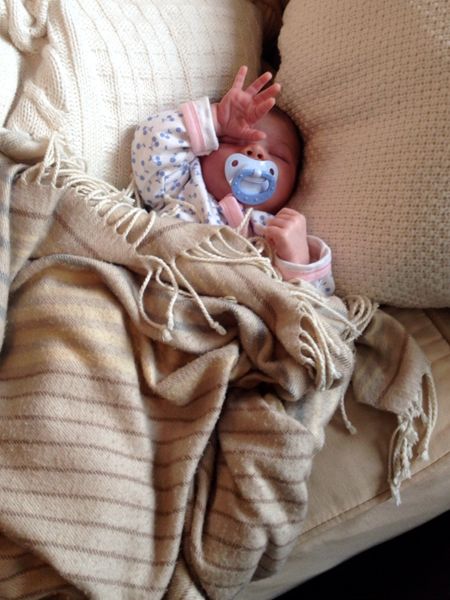
Catching some zzz's in her very first sun hat!

Are you starting to see what I mean....
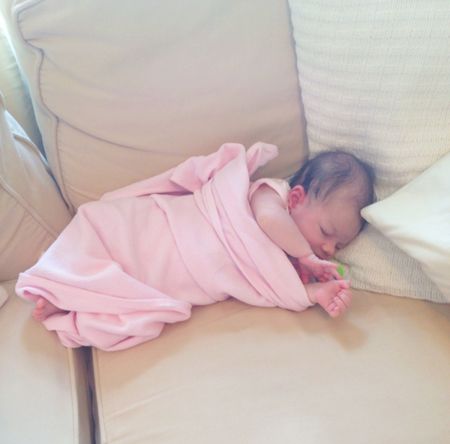
I assume this pose means "No more pictures Mom!" I just can't help myself...
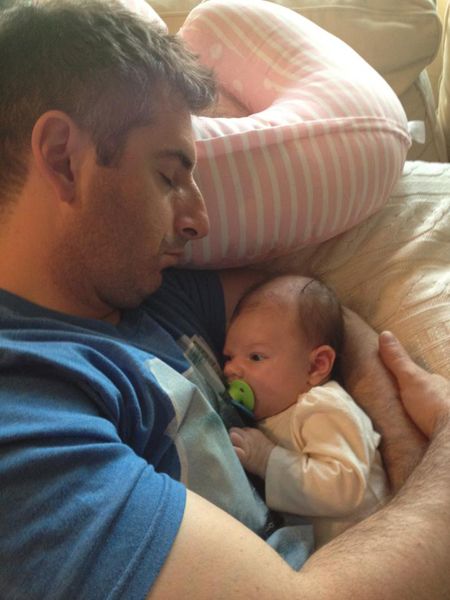
Here I was reading Bree a book to see if I could get her to close her eyes and it looks like it worked.... but for the wrong person, lol.
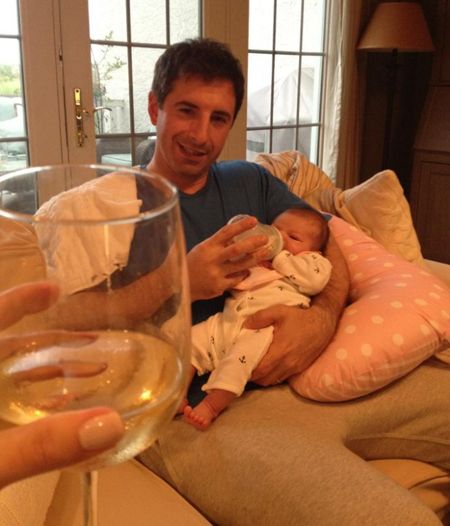
Daddy's first bottle feed so Mommy decided to celebrate Mother's Day a day early.
Here is a picture from my first Mother's Day as a Mom. We walked to go get brunch and enjoyed some warm weather, great food, and even better company.

Bree was extra excited to go out to dinner... Like mother like daughter!

As for me, I'm missing you all very much but loving my time with Bree. I wanted to give you an idea as to what "New Mom Beauty" looks like. I am still wearing my robe at noon, no make up, hair that is longing for a trim, and of course tired eyes! I'd say it's working for me!

I promise to keep you posted with Bree pictures and updates on my Facebook Page {Amy Stran QVC}. I can't wait to be back with you on the Q in July!
Talk to you soon,
Amy
Now that warm weather is officially here, the ladies in the office have begun rocking skirts and Bermuda shorts on the regular. And while our legs are so happy to be free of tights and finally get touched by some sunshine, these two small forms of happiness are also a source of minor despair. Because the very fact that our legs have been tucked away in tights for the longest winter we can remember, not seeing the sun even once, means that they are in dire need of a leg makeover.
So today, two brave ladies took on the self-tanner challenge in order to get summer-ready legs that we are excited to flaunt in skirts and shorts. One of them is admittedly super pale, and the other has a natural nice tan skin tone. Both achieved a great healthy-looking glow!
What You’ll Need: Kate Somerville’s Sommerville360 Body Self Tanning Towelettes.
How To Use Them:
Look at the difference on pale legs!

And then, on tan legs it gives an even, all-over sunkissed look!

Hi, everyone!
So did you all go to your local garden center over the weekend to get supplies for your DIY terrarium? I know some of you asked if I was going to come out with my own kit and I would LOVE to. I think I’ll have a talk with my good friend Phillip Watson from Cottage Farms… Anyway! I also had directions on how to hang a photo collage in Friday’s blog and I’m convinced the paper-to-wall method is every interior decorator’s best-kept secret. If you give either project a try—or plan to, please send me your pictures! I love hearing from you!
I’ll be sharing two terrific recipes for you this Wednesday on You’re Home with Jill…Blueberry Tarts and this one: Salmon en Papillote!
This recipe is prepared with the Temp-tations® Old World Set of 2 9" X 13" Cookie Sheets (K37847).
Salmon en Papillote
Ingredients:

Directions:
1. Heat the oven to 375°F.
2. Fold 2 (15") square sheets of parchment paper in half. Starting at the fold, draw half of a large heart shape with a pencil. Trim paper along the lines.
3. Open the piece of parchment paper and place 1 salmon fillet near the crease.
4. Drizzle the fish with 1 Tbsp of olive oil. Top with 1/2 of the grape tomatoes, 1/2 of the artichoke hearts, 3 slices of lemon, fresh herbs, 1 Tbsp butter, and salt and pepper to taste.

5. Starting at the top of each parchment half-heart, make small, tight, overlapping folds along the outside edge to seal the packet. Twist the ends tightly to seal completely. Repeat the process with the remaining salmon filet.

6. Place both packets on a large baking sheet, and brush each with the remaining 1 Tbsp olive oil. Bake the packets in the oven for 10 minutes.
7. Transfer to a serving plate and slit paper with a knife to open.

So, “en papillote” is French for “in paper.” When you wrap salmon—or virtually any kind of fish in parchment paper—it steams itself, locking in the flavor and moisture, while infusing it with whatever else you put into the packet. In this case, we added tomatoes, artichokes, lemon, and herbs. This recipe works REALLY well with any fish or shellfish, so keep it handy. You can also change up the ingredients you put inside. I just wanted to show you how to make a nifty little packet…now let your creativity soar!
Before I close, I have something REALLY exciting to share. On July 18-20, we’re having our very first You’re Home with Jill Weekend here at QVC!!!!

In other words, you can come and hang out with me for an entire weekend of friendship, food, and fun. I've been very involved in planning our itinerary....it includes a night at Longwood Gardens (one of my FAVORITE places!) a tour to see the costumes of Downton Abbey (soooo cool!!) high tea at the prestigious Hotel DuPont, and of course, lots of QVC shopping and watching...you'll be my live audience for part of our Christmas in July event! It would be my pleasure to meet to you....so if it's possible, come see me! Don't wait to get your tickets, spaces are limited!
Check out the new episode of You're Home with Jill on QVC.com tomorrow. Or, if you’re one of the lucky folks who get QVC Plus, you can watch at 7pm ET.
From my home to yours,
—Jill

Mary Beth needs help picking the dress she’ll wear this weekend! She’ll be attending the wedding of her friend Linda Davies’ daughter, Meg. She looks so beautiful in both, we see why she’s having a hard time deciding!
Hi, everyone!
For those of you who have heard me say this 1,000 times before, my apologies. BUT…I absolutely LOVE flameless candles!! I think they may be my favorite accent piece because they’re just so versatile and appropriate in any season…not to mention safe and worry-free.
I’m often asked how I incorporate flameless candles into my décor and I thought it would be nicer to show you in photos. Five of the seven shots below feature the Aqua Flame candle from Bethlehem Lights because I think it’s just the coolest idea ever. But you can use any flameless candle and get the same great effect.

Stairs aren’t a place people often think about putting candles and I’d definitely say this is more of a special occasion kind-of-thing if you have kids and pets at home like me. But, if you’re having a party and there’s no real reason for guests to go upstairs, decorate the staircase with a flameless candle or two. Imagine these outside on porch steps too—how welcoming!

I nestled this candle among a few decorative branches. It feels really earthy and natural to me—very much along the lines of bringing the outdoors in, which, if you remember, was one of our episodes this season on You’re Home with Jill! It’s such a popular theme in design right now.

The beauty of flameless candles is being able to incorporate them into your existing décor…there’s no need to make them the center of attention, unless you want to. I like to set the timer on my candles so I don’t have to think about turning them on or off. It doesn’t get easier than that.

Remember that rule of three design concept I talked about in my blog a few weeks ago? Here we go. Grouping things in threes creates harmony and cohesion in your design. It invites the eye to be drawn to a focal point, which is comfortable for the admirer and ultimately makes your décor feel comfortable.

Another great example of the rule of three and how you can work these candles into your existing scheme. Note how we also mixed the textures of items in this photo-- they add interest and prevent your décor from falling flat. I also blogged about that!!

Now this is a two-fer shot. The live arrangement in the front is another terrarium-like idea you can try. The centerpiece in the foreground is summery and fun. Put a flameless candle inside any clear decorative vase—like an apothecary jar—and then add sand and some seashells. You’ve just brought the beach home.

Now let’s go outside. Obviously the floral centerpiece was my focal point, but I accentuated it with Home Reflections Hurricane & Candle Set by Valerie—which is now on clearance! Go stock up!
Happy decorating! May your battery drawer always be full!
From my home to yours,
—Jill
Hi, everyone!
Have you ever seen those home-makeover shows where they make a headboard in like two minutes? Because I see the magic of TV every day, I know that it really takes longer than those two minutes. But, I honestly didn’t know if it was an all-day affair or not. So, I decided to try it.
All in all, this took me about two hours…not bad for a Queen headboard that looks amazing, if I do say so myself! And, here's exactly what I said in the video so you have the steps handy.
You'll Need:
Assembly:
That's it! Your very own custom headboard is just one of the projects we’re tackling on You’re Home with Jill this Wednesday…I’ll also have DIY lampshades and an easy floral arrangement to show you, too. I hope you have an incredible memorial day weekend! May the weather be nice and your barbecues be yummy!
From my home to yours,
—Jill
Hi, everyone!
How was your holiday? I spent the holiday down the shore and it was the most beautiful Memorial Day weekend I can remember. There wasn’t a cloud in the sky yesterday or Sunday and I soaked up family time like a sponge. We had a terrific dinner last night complete with the quintessential summertime dessert: Key Lime Pie...with white chocolate!

We’re featuring this recipe as well as Iced Tea Three Ways on You're Home with Jillthis Wednesday—oh wait, that’s tomorrow!—on QVC PLUS or QVC.com. (Remember, if you’re watching on TV the show starts at 7. You can watch anytime tomorrow just by going to QVC.com.) I showed you how to make a headboard on Friday. And, I just felt you needed a little White Chocolate Key Lime Pie in your life right about…now.
Now that you’re STARVING, here’s the recipe so you can run to the grocery store. (Sorry!)
White Chocolate Key Lime Pie
Ingredients:
Directions:
Talk about a little slice of heaven…

See you tomorrow, everyone—if you’re lucky enough to still be on vacay, ENJOY!
From my home to yours,
—Jill
P.S. There are a few tickets left to theYou're Home with Jill Weekend July 18-20. I'd love to see you there!!!
All summer long our shoe shopping family will be sharing summer adventures called, “A Walk in Your Shoes!” and we will show the pictures on Shoe Shopping with Jane. I went first! Here they are in case you missed them last night.

We took a quick trip to the most magical place on earth. We dressed as our favorite characters for the 24 hour special event (and were there for about 16 hours!) And we were thrilled to spend time with my nephew, Dan, who was working in Orlando!

Here we are as Mary Poppins and Bert.

Cara was Elsa and Deirdre was Anna from Frozen.

Rides!

My nephew, Dan.
I hope you will join the fun during Shoe Shopping with Jane every Thursday night to see more great vacation photos of our shoe family!
-Jane

Well the month of June is finally here and I am hoping that we can share ideas to help make graduation memories… I found some ideas that I was going to use for Nicole’s graduation and I am hoping you can give me some additional ideas!

My mom and I decorated multi-colored mason jars for table decorations.. I placed tags on them spelling out 2014...we also added decorative pebbles to anchor the graduation caps on the sticks...I love the adorable candy grad caps! The day before we will take the lollipop sticks and take mini Reese peanut butter cups and pieces of chocolate bars, mini M&M's and pieces of licorice.. Everything will be held together with icing... Place them in the mason jars and grad table decorations..
I used two long candy sticks and wrapped with a ribbon as diplomas for place settings..

I bought a large 2014 sign and will back with foam board so that family and friends can leave messages...Ordered a cake with her picture and balloons..
Please share your ideas! I really want to make this a wonderful memory for Nicole so I could use your suggestions..and I promise to share pictures...!!!
Here are a few special ideas I received from Colleen, Janie and Mandy:
These would be cute in the school colors. This is Reese mini peanut butter cups with a block of Hershey chocolate bar broken up for the hat.

Have Nicole and her friends write their future goals and keep them in the mason jars to only open ten or 15 years from now. They can also write each other notes and read them when they open! Like a home capsule!

Place flowers in unique vases then after the party take the flowers and press them in a special book for life time memories… I still have my mother’s carnations from when she graduated pressed in her yearbook.

You can find me on Facebook at: www.facebook.com/PatJamesDeMentriQVC
Twitter: http://www.facebook.com/PatJamesDeMentriQVC
Instagram: www.instagram.com/PatJamesDeMentriQVC
Hi, everyone!
I’m sure you’ve been to a wedding or formal event where there’s a buffet, right? But have you ever considered having a buffet of your own at home? I find it’s a super easy way to host guests—you really only need to decorate one central table. And, with pretty oven-to-table bakeware, there’s no need for many serving plates and platters. A buffet is also more casual than a formal sit-down meal and I think guests feel more relaxed and are free to do what they like and eat what they like.
A weekend brunch buffet is one of my favorite ways to entertain…you get to make all those yummy breakfast foods and you can really be creative with your decorating. For example, have you ever tried decorating with a single color? It’s super easy way to create a classy, cohesive look. See?

Doesn’t that look sunny and happy? And so chic?

Here’s what pulls this whole look together…

The white and greens in the flower arrangement make the yellows on this tablescape look natural. I then just added more natural accents using the flowers as my guide…a rustic silverware tray, natural wooden stands to bring height and more color to the table. White plates and china don’t detract from the yellows, only enhance. (Virtually everything on my buffet table is available on QVC.com! The complete list of items is at the bottom of this blog.)
Notice the menu plate right in the front? It’s SO easy to make one of these!


I used chalkboard paint you can buy at any craft store and a plain white (dollar store!) plate. Then, I bought a chalk pen to write the small recipe names on the front. You can find lots of my great brunch recipes on QVC.com.
This buffet table and menu plate are both part of the next You’re Home with Jill that airs this Wednesday on QVC.com and QVC PLUS®. Our topic for the day is Family Celebrations and I have a very special guest joining me…my mom! :) Happy Friday to you all, I hope you have a glorious weekend. Blue skies are in the forecast here in West Chester. YESSSS!!!!!!
From my home to yours,
—Jill
P.S. All of those gorgeous dishes and appliances are available on QVC.com...here are the item numbers!
Confession: every time I'm on air and speaking about possible graduation gifts, I'm also doing something else you can't hear or see: I'm thinking about my own daughter's graduation! Not the big cap-and-gown, can't-believe-college-is-next graduation (thank goodness that's four years away!). No, my Gabby is taking the leap from 8th grade to high school.
She's my only child, and so I do my best to savor every milestone. And I can't believe this one is already here. I'm sure you can relate...it feels like yesterday I was groggily changing 3am diapers!
(Don't tell her I said that :-) )
One of the ways that Gabby's school marks the end of this big year is with their big 8th Grade Formal dance. Gabby's first boy-girl dance...eeek! It reminded me of my first dance, after which I found out my mom had been parked in the lot outside the school the whole night "just in case I needed an early ride home" (I still let on that I believe that one, by the way!). And now that I'm a mom I understand the emotions that arise out of this big event. But rather than let these passing milestones get me down, I've found only great joy in them. Yes, I'll never get these moments back. But to me that's the amazing part.
Each of these celebrations is a gift. Just Like every day I'm blessed to live. And so as our own QVC makeup artist Lia styled Gabby's hair, I said aloud to God:
"Thank you."
As Gabby and her friends giggled and helped each other straighten out their dresses, I said aloud:
"Thank you."
As I snapped photos of my princess, the most beautiful creature I ever have and will ever see, I said aloud:
"Thank you."
And as Gabby stepped out of the car for her last function as an 8th grader, I said aloud:
"Thank you."
I'm working every day to live more in the moment and be grateful for every blessing. That night left my cup overflowing. Here are a few photos of this milestone. Thank you for sharing in it with me...I'll let you know how I'm holding up as the mom of a high schooler!!!


Track our progress as mom/daughter and best friends here on Facebook:
Oh, and if you want to check out the Beachwaver Lia used to make Gabby's crazy-cool hairstyle click here!
Thanks for reading!
-Jennifer
Hi, everyone!
I know I tell you I’m excited about every episode of You’re Home with Jill that’s coming up, but tomorrow’s episode features a VERY special guest…my mom.

I’m so lucky that my mom lives close by…I love spending time with her, my kids love their grandma, and I’m just so grateful to have such a close relationship with her. She’s given me the tools to be a good wife, mother, and friend. And without her, I wouldn’t be me.

I convinced her to join me for Wednesday’s episode because our topic is preparing for a family brunch! And not only did she come, but she came bearing her original recipe for Sock It To Me Cake.

Of course I asked her to help me make it...it's always easier when you're cooking with someone don't you think? Here’s how it went:
Sock It To Me Cake
Ingredients:
Directions:
Preheat the oven to 350°F. Grease and flour a Bundt pan.
Beat the cake mix, eggs, sour cream, sugar, and oil for three minutes with a hand or stand mixer. Pour half the batter into the prepared pan and set aside.
Combine the brown sugar, cinnamon, and nuts in a small bowl. Sprinkle the nut mixture on top of the batter in the pan and then pour the rest of the batter on top. Bake for 45–60 minutes, or until a toothpick inserted in the center comes out clean.

Doesn’t it look delicious? I’ve got three more recipes to share with you in tomorrow’s episode…Raspberry Lemonade, Broccoli Chicken Casserole, and homemade bread you bake in little terracotta pots! They're ADORABLE. If you missed Friday’s blog, be sure and check out my yellow and white buffet table, which is our main DIY project for the show. You can watch the episode anytime tomorrow on QVC.com. If you’re tuning in on QVCPLUS, it’s on at 7pm ET.
From my home to yours,
—Jill
We asked to see how you #ColorYourKitchen. Take a peek at some of our favorites below!


Share your colorful kitchens in the comments below!
Woo Hoo! Summer is here!
No matter where you live in this great land of ours, the kickoff to summer has arrived. Any day now, the school doors will burst open with screaming kids dashing into the sun. The pool will be packed with splashing happy faces, and hopefully you’ll be able to find a slice of paradise to enjoy. With all this time outside, there seems to be a focus on getting away from it all (technology included), but there is definitely a place for some really cool gadgets this time of year. Here are a few to keep by your side this summer season:
Bluetooth Speakers- What’s summer without great tunes? Whether its Jimmy Buffett, Bob Marley, or classic rock, a summer soundtrack with great speakers is a key element to that backyard BBQ. Bluetooth technology is standard in almost every smartphone or tablet, and many laptop computers. If you’ve never used it before, now is the time to start. The speakers built into your favorite device is good enough if you are by yourself in a quiet room, but there’s no way it will be good enough for that summertime bash. Bluetooth allows devices to wireless connect, and a wireless speaker is essential to boost the sounds of summer. In order for both devices to communicate with Bluetooth they need to be within 30 of each other. So keep your phone in your pocket, play DJ, and keep the party alive with your summer favorites.

To view our full assortment of Bluetooth speakers click here!
Tablets & e-Readers- You probably know by now that I am a huge fan of the iPad and it can be a great travel companion. However, if you want to read outside by the pool, sometimes I prefer to pull out my e-Reader. I love reading books on my iPad, but in direct sunlight, the LED screen can be a challenge to see clearly. Many e-Readers have what is called an e-ink screen that doesn't have any back-light. It gives the reader a book-like experience without a 500 page thud of weight on your lap. Keep in mind, if you do choose an e-Reader like the Kindle, you can always download the Kindle app on your iPad or Android tablet and enjoy the book in both places. Of course, you only have to pay for the book once, even if you are reading the books on multiple devices. I will often start a book on my reader while lounging in the backyard and continue reading on my iPad during those rainy indoor days.

To shop for a tablet or e-Reader to take with you on your next adventure or stay at home vacation, click here!
Staying charged – Portable power is the final must-have of the season. I am always on the go in the summer with swim meets for the kids, long bike rides down quiet country roads, or just strolling along the shore. The point is, I am nowhere near a place to plug in my stuff. Thankfully, something as simple as a Halo means I don’t have to be. The more mAhs the better when it comes to these on the go chargers. Many smartphones have a battery of about 1500 mAhs, and a charger of 5000 mAhs is about the same size of that phone. Having that extra juice in your pocket could mean the difference between getting a picture of that perfect sunset or just trying to remember what it looked like.

Click here to make sure that you stay powered up on your next trip.
Of course, unplugging is ideal from time to time during the dog days of summer, but don’t be shy about letting tech make those summer time memories even greater. Happy summer to all, and don’t forget your sunscreen
Don't forget to tune in every Thursday at 9pm eastern, while I take a look back at some of the great moments from the week before with Program Host Kerstin Lindquist on our new show called Q- Review! If you think you missed it, don’t worry because we’ll have it. The greatest products, the funny moments, the cool behind the scenes stories that you won’t find anywhere else is what this show is all about. If you are new to QVC Plus, it is a 2nd channel QVC launched with the goal of getting us to better connect with you. Not every cable system has picked it yet, so check the list below to see if you can watch in your area. If not, don’t worry. You can always see cool stuff like Q Review on qvc.com.
0032 | Atlantic Telephone Membership Corp. |
0284 | Time Warner Cable |
1091 | Kuhn Communications, Inc. |
1154 | Massillon Cable TV, Inc. |
1233 | New Knoxville Telephone Co. |
1851 | 4Com, Inc. |
2002 | DIRECTV, Inc. |
2050 | Fidelity Cablevision, Inc |
2098 | TSC Communications, Inc |
2101 | Cincinnati Bell |
2125 | Carson Communications |
2403 | BTC Multimedia |
2420 | Thames Valley Communications |
2441 | Atlantic Broadband |
2514 | City of Burlington d/b/a Burlington Telecom |
2521 | AT&T Services, Inc. |
2563 | Morristown Utilities Commission |
2679 | Bright House Networks |
2811 | Vermont Telephone Company Inc |
If you have any questions check me out on facebook at Craig Smith for QVC! See ya Thursday
Our summer Walk In Your Shoes Mini Series on Shoe Shopping with Jane continues. The member of our shoe family featured this week is Leilani Learn from Ryka. During the show she shared these great pictures of her beautiful family and their trip to Fenway Park. I wanted to share them with you in case you missed them. They are adorable. Enjoy!

Hubby Sean with Connor, Gabby and Patrick!


Tune in next Thursday to Shoe Shopping with Jane to see who from our shoe family is featured next!
-Jane
Hi, everyone!
It’s another picture perfect day here in the Philadelphia area and this weekend is supposed to be just as nice. Isn’t summer wonderful? It’s a season that’s literally made for outdoor entertaining. So this Wednesday on You’re Home with Jill, I’m going to show you how to host a summer barbecue. I've got recipes from our special guest, Meredith Laurence, The Blue Jean Chef. And I've got lots of great ideas on how to set a summery table!

Isn’t that adorable? There’s nothing more family-friendly than that—and virtually everything you need for your barbecue is right there. Talk about functional decoration. Almost the whole scene is made from things I had at home…the wagon, the trunk organizer, the lanterns, the picnic basket, the cake plate, everything! And, of course, the most important part of all…the bandanas.
The idea to decorate with bandanas actually stemmed from the utensils. When you’re outside, it’s always nice to have the napkin and silverware in one easy-to-carry package. And you NEED to have something heavier than paper napkins if there’s ANY wind....and there always is! So I went to my local craft store for napkin inspiration and I found the bandanas. I thought, how perfect…I already have a few, I can get more cheap, they’re functional, and I can do a patriotic theme and use my Temp-tations®, Le Creuset, and Rachael Ray pieces.

How cute! Then I thought…what if I got a few extra bandanas and placed them on the table for decoration? Well…it worked. I think those bandanas just made the whole theme feel cozy and familiar…reminds me of the good old days and lazy days of summer.

Here’s a close-up of the silverware...I used swatches of extra fabric and spare buttons to secure them closed.

Then, I grabbed a basket and wove some extra fabric through the wicker to tie it all together.
I know there’s so much to see here…I promise I’ll tell you everything in this Wednesday’s episode of You’re Home with Jill…exactly what I used where and why. You can watch anytime this Wedneday on QVC.com. If you get QVC PLUS(R) on TV, you can also see the show at 7pm ET.
From my home to yours,
—Jill